htmlPy is a really great tool to make an awesome web or stand alone application. htmlPy is a wrapper around the famous PySide QtWebKit module, which enables you to make full blown GUIs using HTML/JSS/CSS and Python. When I first came across htmlPy, the documentation wasn’t very clear to me so I had to stumble around a little bit to get things figured out, and thought it would be nice if I wrote a tutorial showing everyone how to get it up and running. The ultimate goal of this tutorial is to build a nice GUI with Python backend bindings to interface with our Raspberry Pi!
A few things I love about htmlPy are:
-
It can be used with any Python module or webframe work like Conda, Django, and Flask.
- It supports front end frameworks like Bootstrap and jQuery, so rapid prototyping is a breeze
- HTML/JSS/CSS are easy, intuitive languages to make a great GUI in no time
- It supports both Python 2 and 3
- Since it is built on the Qt framework, your app is completely functional across all platforms
In this post, I’m going to show you how to get htmlPy up and running on your machine and build a stand alone app using a single HTML and Python file. In another post, we’ll get Bootsrap up and running so that you can start making your apps look even better.
htmlPy Installation
You’ll need the following dependencies to get htmlPy up and running:
- Python 2 or 3 (I’ll be using 2.7.11)
- pip for Windows / Homebrew & pip for Mac OS X (if you don’t already have these on your machine, you should)
- PySide
On Mac OS X:
brew install qtafter that, install PySide:
pip install PySideand lastly, install htmlPy (you may need to sudo this):
pip install htmlPyOn Windows:
pip install PySideNow that we have all of the dependencies installed, we can dive into making our first application.
Make a new folder where you want your project to be; I named mine ‘site’. htmlPy looks for an index.html file to be in same directory as the Python script you will execute to run your app. Go ahead and make your index.html file and place:
<h1>Hello, World</h1>
<p>I'm using htmlPy! Pretty neat stuff!</p>
There are two types of applications that htmlPy can make: a standalone application, which we’ll be making here, and a web based application.
To make a standalone application, create a new Python file name main.py and place it in the same directory as index.html.
    import htmlPy
    import os

    app = htmlPy.AppGUI(title=u"htmlPy Quickstart", maximized=True)

    app.template_path = os.path.abspath(".")
    app.static_path = os.path.abspath(".")

    app.template = ("index.html", {"username": "htmlPy_user"})

    app.start()
This code instantiates a new application called ‘app’, uses Jinja2 to render ‘index.html’, and starts the app. If you don’t have Jinja2 installed, just type (you guessed it):
$ pip install jinja2Now open your terminal and navigate to the directory where you have your project saving to and run main.py
python main.pyAnd you’ll see…
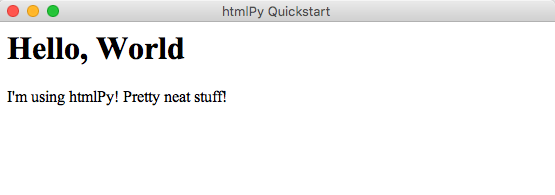
That’s pretty cool right? You’ve successfully created your very first stand-alone Python app using nothing more than a couple of lines of code. Let’s add a button to our demo app.
<!DOCTYPE html>
<html>
<body>
<h1>Hello, World!</h1>
<p>I'm using htmlPy! Pretty neat stuff!
<br>
<button type="button" onclick="alert('Hello world!')">Click Me!</button>
</p>
</body>
</html>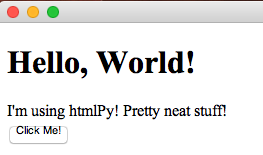
By now you should see that whatever HTML you place in Index.html will be placed in your app. In the next part of this tutorial, I’ll show you how we can install Bootstrap and add Python backend bindings to do things!
Till next time. -Adam